How to Make Christmas Ornament Clusters
Ornament clusters are a great way to create a major statement on your garland. They’re perfect for the corners of your porch opening, or the centerpiece in the middle. Clusters are easy to get wrong, and the mistake is almost always the same: making both sides identical. This is the anchor layer in the layered porch garland.
The Formula
Every cluster I build uses roughly the same count: 1 extra large, 3 medium, and 6–8 small. Add more for a wide porch, fewer for a narrow one, but keep the proportions. One dominant piece, a few supporting, a lot of filler. When clusters don't work, it's usually because everything is the same size. Your eye has nowhere to land.

Match Structure, Not Ornaments
If you're building two corner anchors, you want each side to match in structure and texture, not in exact ornaments. The same size formula, same color story, but different actual pieces. Here, I used large pink ornaments—some velvet, some shiny, some with textural designs—and warmed them up with metallics: gold, copper, bronze. The left and right anchors read as a matched pair from the street. Up close, they're not the same at all.

Balanced, Not Symmetrical
Balanced means the visual weight is even—one side doesn't feel heavier or emptier. Symmetrical means you mirrored it, and mirroring is what makes a cluster look store-bought. How to build balanced ornament clusters:
Place your star off-center: Not in the middle of the cluster.
Cluster the mediums around it, unevenly: Two on one side, one on the other.
Scatter the smalls to fill: Push some deep into the greenery and let others sit forward. That depth is what creates shadow, and shadow is what makes it look full.
Distribute your finishes: Don't put all the shiny ones together or all the velvet ones together. Mix the textures across the whole cluster so light hits it in several places.
Mixing Texture
A cluster of all-shiny ornaments reads cheap because every piece reflects light the same way. Mixing finishes gives you depth. Aim for at least three finishes in every cluster.
Velvet and matte absorb light and read rich and moody.
Shiny reflect and give you the sparkle.
Textured and glittered sit between the two and break up flat spots.
Metallics — gold, copper, bronze — add warmth without adding a new color.
Want to take your ornament clusters to the next level? Make sure you choose the right ribbon.
Before you get started, don’t forget all the boring supplies you’ll need to finish—from floral wire and zip ties to command hooks and a hammer.
Attaching Ornaments
Use floral wire to attach to the faux garland or the sturdiest real stems. Wrap the wire through the ornament cap and around the stem, then bend the stem back into the greenery so the ornament sits where you want it instead of dangling straight down. Play with the direction until you position it where you like. You can also attach ornaments together, if you want to be sure they don’t get lost–this will be particularly helpful if you create cascading echoes of ornament clusters to flow down your garland.
Two tips before you start:
Check the caps before you hang anything. Ornament caps pull off easily–make sure it’s actually well-attached to the ornament before hanging.
Outdoor ornaments must be shatterproof. Wind, doors slamming, and a hard freeze will break your glass ornaments. Save the glass ornaments for indoor mantles and choose shatterproof options outside. This is also a budget-friendlier way to get larger ornaments to create the statement you want.
Take it to the next level by adding ribbon around your ornaments—don’t skip these tricks to make sure your ribbon doesn’t look flat.
Other Variations
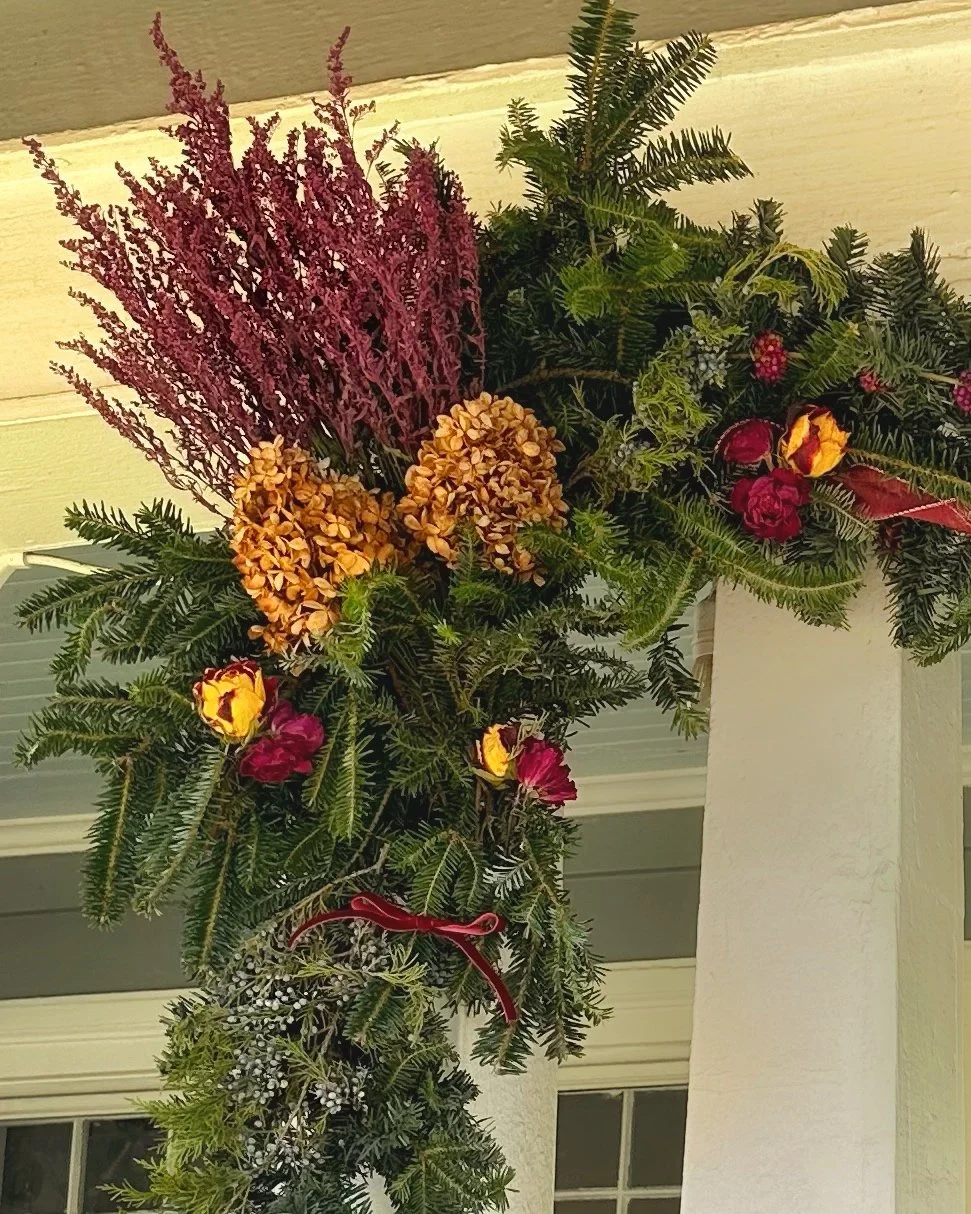
No ornaments at all (shown here). Use the same formula with all natural materials. One large dried hydrangea, three dried orange slices, a scatter of beauty berry.
Monochrome. Choose one color in every finish—the texture does the work. All burgundy, from velvet to glass to glitter.
Mini clusters for a wreath or bannister. Drop the scale to 1 medium + 3 small and repeat it at intervals.
Some of the links in this post are affiliate links, which means I may get a small commission if you make a purchase—at no additional cost to you. As an Amazon Associate I earn from qualifying purchases.
Shopping List
Get the look! Where my actual products are sold out, I share the best alternative for the same results.
Ribbons
Ornaments
